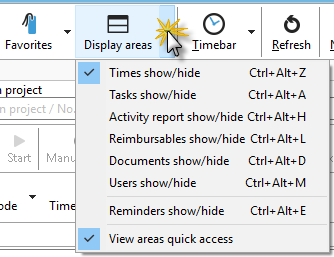
You can optionally display your timestamps in the Project Manager. To do this, click on the "Display areas" menu item in the Project Manager and select "Times on/off."
The timestamps will then appear in a list, by default below your project list in the Project Manager.

Your timestamp list also offers the option of displaying a chart. The data in the chart is always displayed based on the selected grouping of your timestamps. In the example, the data was grouped by project, so the graphic is also based on projects.
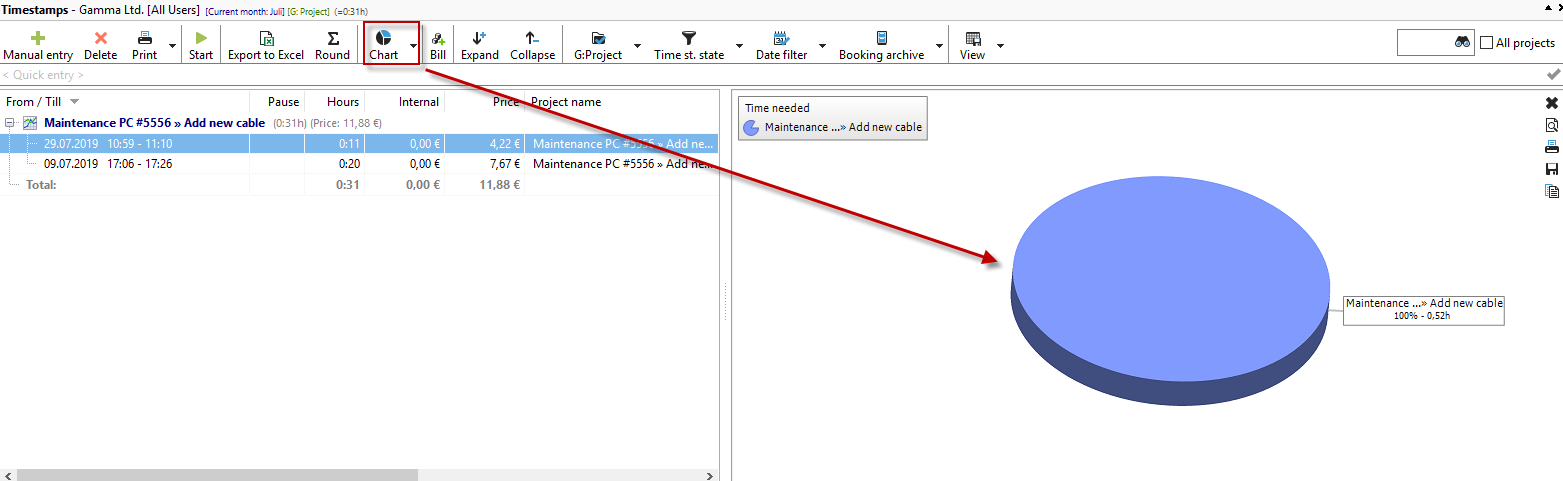
By right-clicking on the graphic, you can enlarge the view, print it, save it, or copy it to the clipboard to use it in another program. These options are also available as buttons on the right side of the graphic if you do not want to use the context menu.

You can also display comment fields in the timestamp list in multiple lines. To do this, right-click on a "from/to" time and select "Wrap comment column."
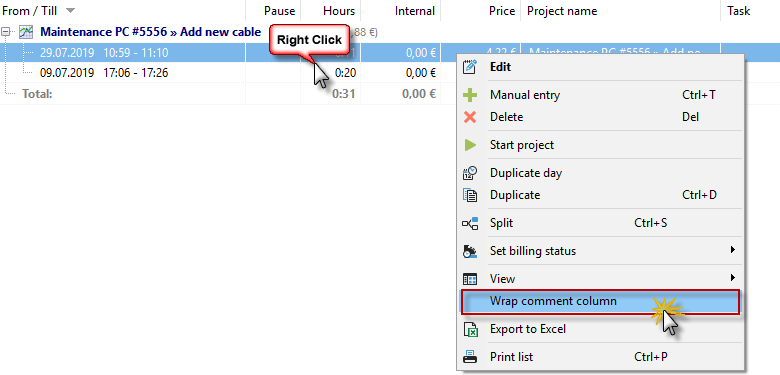
Long comments are now displayed with line breaks.

If the timestamp list is collapsed, expand it again using the small arrow on the right-hand side.

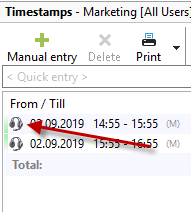
The narrow green bars to the left of the timestamp show the relationship between the end time of the last stamp and the start of the new stamp. If there are no gaps in the timestamps, a continuous green bar appears. If there are gaps, no green bar is visible next to the timestamp.
You can edit the comment for the timestamp directly in the Project Manager. You no longer need to open the timestamp to do this. Select the timestamp with the mouse and press F2 to enter a comment.
You can display multi-line comments by right-clicking on the timestamp and selecting the "Wrap comment column" function.

You can copy a comment with Ctrl+C and paste it into another timestamp with Ctrl+V.
You can also insert text modules by right-clicking on the comment area:
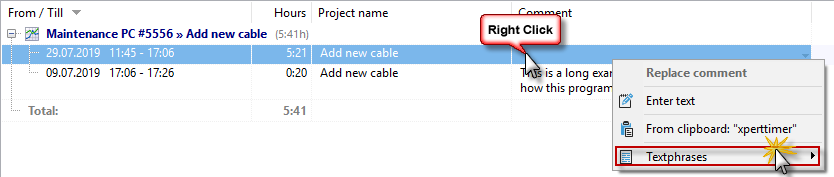
If you want to enter the text in several comment fields at the same time, select the timestamps with the mouse and choose the desired action by right-clicking:

Right-clicking on a timestamp brings up the following menu:

Here you can edit the timestamps retrospectively.
If you want to combine multiple timestamps or split a timestamp, you can also do this here. Please note that the timestamps you want to combine must all belong to the same project and be contiguous in terms of time. When splitting the timestamp, you can specify at what point in time the stamp should be split.
If necessary, you can change the status of the timestamp. If, for example, you do not want to bill a timestamp, change the status here to "not billable."
You can also change the font size or button size and the display of your timeline in the configuration.
|
Tip |
|---|---|
You can add comments to the timestamp for a current project. To do this, use the keyboard shortcut Win+F4 or select "Edit active timestamp" from the context menu. |
|
You can also change the font size, button size, and display of your timeline in the configuration.
|
Intelligent quick entry |
|---|---|
Be sure to read the chapter "Intelligent quick entry" on creating timestamps. |
|
Save timestamp view
Once you have grouped and filtered all the data as you need it, you can save this view. This allows you to return to your filtered view with a single mouse click. To do this, select the "View" -> "Save as" option in your timestamp view and assign a meaningful name.

The view is saved under the name "Employee times per week."

To display the data again, simply click on View and it will be displayed at the bottom.

By right-clicking in the menu area of the timestamp list, task list, and services, you can choose whether you want to display the saved views.

Timestamp list in a separate window
Using the "View" menu item, you can also display your time stamp list in a separate window if required. This allows you to display large amounts of data more effectively.

Print timestamp list
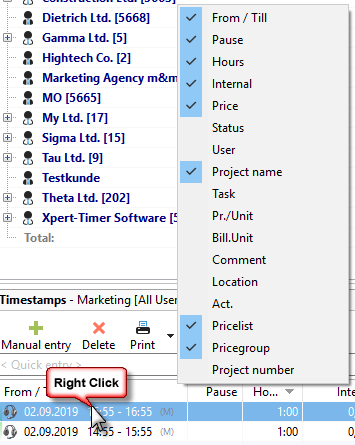
You can show or hide columns in your project list for your report. To do this, right-click on a column.